Are you planning to create tables in WordPress? If you are, keep reading this article!
If you need to organize your data better, use tables. Whether you’re adding a comparison section, a feature listing, or something similar, tables are the #1 way to showcase the data without any effort.
When you use WordPress as the CMS, multiple methods exist to add a table to your website or WooCommerce store.
In this guide, we will show you the best methods to create tables in WordPress without hassle.
Without any further ado, let’s get into the tutorial.
☲ Table of Contents
- How to Create Tables in WordPress
- Best WordPress Table Plugins
- Best Practices for Creating Tables in WordPress
- Frequently Asked Questions
- How Can I Align Columns Properly in a WordPress Table for a Consistent Design?
- What Are the Best Ways To Add Color to Table Cells in WordPress?
- Can I Create Responsive Tables in WordPress Without Using a Plugin?
- Is It Possible To Use Advanced Features Like Search Filtering In WordPress Tables?
- What’s the Best Approach To Handle Complicated Designs With Multiple Table Rows and Columns?
- Can I Apply Custom Styles to Individual Table Elements?
- Which Plugin Should I Use for Table Color Settings and Design Customization?
- What’s the Best Way To Format Table Content for Better User Experience?
- Conclusion
How to Create Tables in WordPress

There are four methods to create tables in WordPress:
- Using the Gutenberg editor
- With a WordPress Table plugin
- HTML coding
- Using the WordPress Classic Editor
Below, we will show you all the methods. You can pick an option based on your preferences.
Without any further ado, let’s get into the tutorial.
1. Add Table in WP using the Gutenberg Block
You can use the Gutenberg table block if you do not need a dedicated plugin to create tables in WordPress.
In this section, we will show you how to create tables in WordPress with the Gutenberg block.
First, open the Gutenberg editor and search for the table block.

Once you have found it, add it to the editor. The block will then ask you for the number of rows and columns you need. You can add those values and click Create Table.
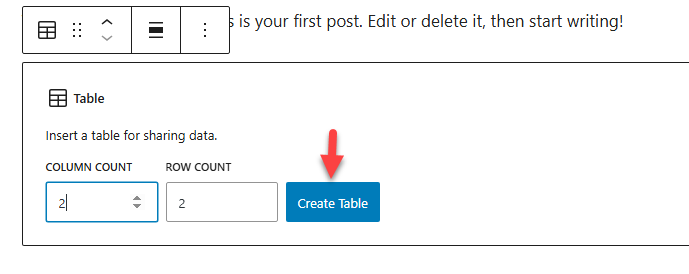
Now, Gutenberg will create the table.

If you check the right-hand side, you can see the customization options.
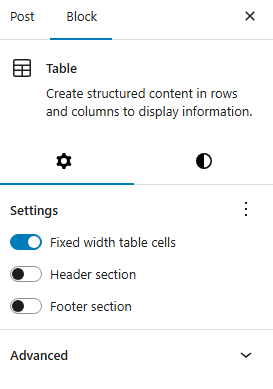
The block settings will show you options like
- Fixed width for table cells
- Header section
- Footer section
The first option ensures the cells have the same width, so there won’t be any visibility or alignment clutter. The header and footer sections help you add a dedicated section to the table’s header and footer.
Here’s how it will look after adding header and footer to the table.

These labels would come in handy when you create custom tables, like a comparison table.
Besides the right-hand side, you can see some customizations on the top of the block too.
You will see regular options like adding bold, italic tags, internal links, alignment, etc. However, you can see additional options if you check the table icon.
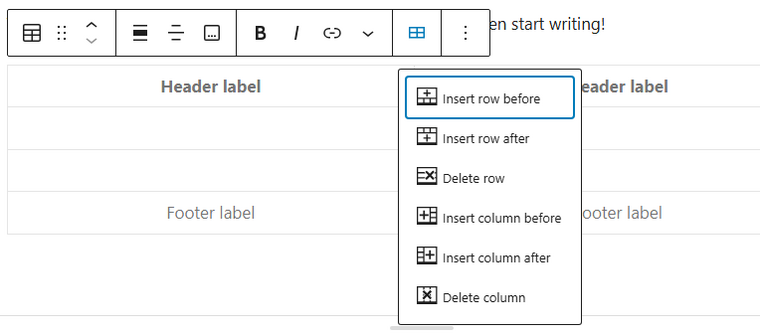
The options are:
- Insert row before
- Insert a row after
- Delete row
- Insert column before
- Insert column after
- Delete column
Here, we will add a new column and row. Of course, fill the section with the information you need to display. Now, here’s an example of a sample table with some data.
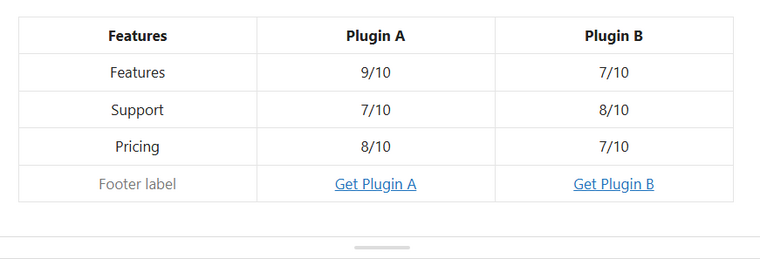
On the front end, added table will look like this:

That’s it!
As you can see, you can add tables in WordPress using the content editor with ease. You can add basic tables this way. Well, if you need a method that will give you a bit more control, check out the next section.
2. Add Tables in WordPress with a Dedicated Table Plugin
If you need to take things a bit further, you can use a dedicated plugin. There are multiple WordPress table plugins available, such as TablePress or wpDataTables.
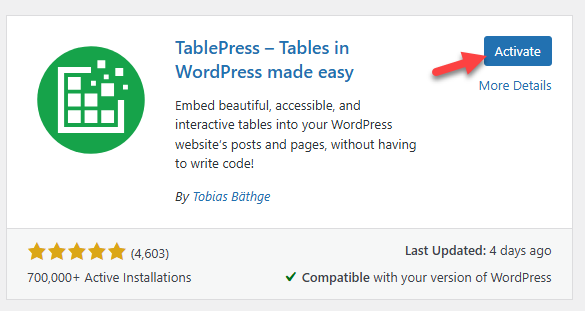
For this tutorial, we will use TablePress to create tables in WordPress. The first thing you need to do is install and activate the plugin on your website.
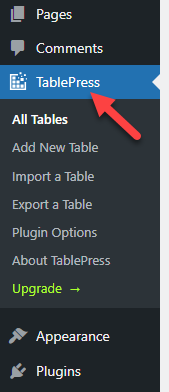
Once you have finished activating, you can see the plugin’s settings on the left-hand side.
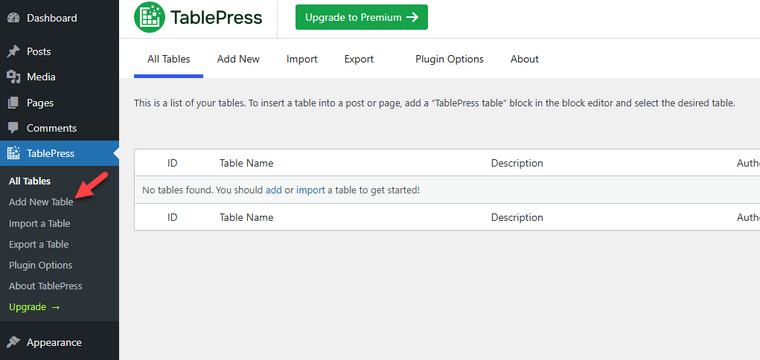
There will be no tables by default. You need to hit Add New to start creating a new table.
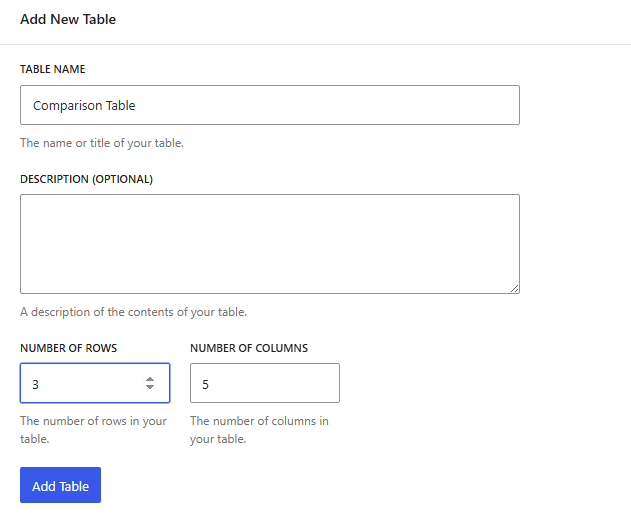
Now, you need to name your table, give it a description (optional), and choose the number of rows and columns you need.
On the next page load, you can see the table content.

Below that, you can see the table manipulation tools offered by TablePress.

From there, you can add new rows, columns, links, and modify the entire table you created.
Below that, you will see the main table options.
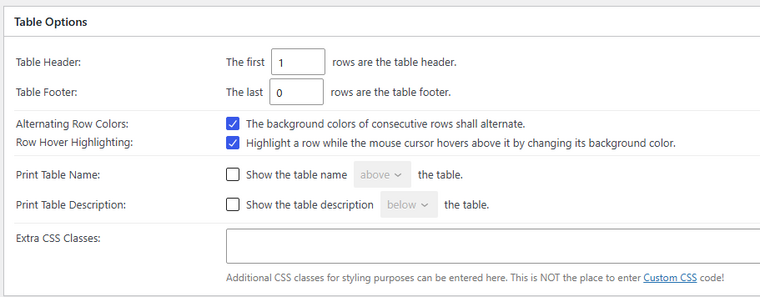
Finally, you will see the site visitor settings.
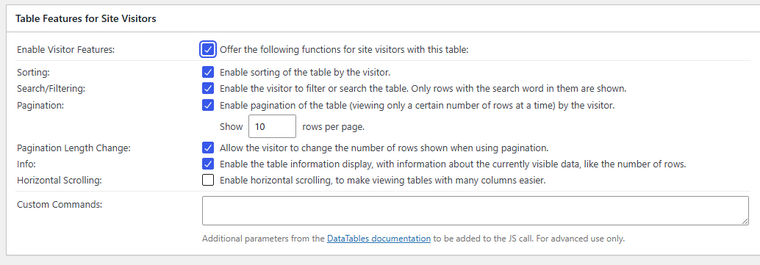
Once you have updated the table data, save the settings.
Now, it is time to embed the table in the website. Open the Gutenberg editor and search for the TablePress Block.

Now, from the right-hand side, you can select the table you need to embed.
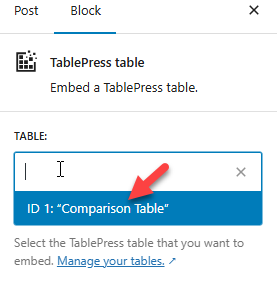
Update the post and check it from the front end. You will see the live table there.

As you can see, using a plugin, you can create tables in WordPress with minimal effort. Next, we will show you how to use coding to create tables in WordPress.
3. Insert a HTML Table in WordPress
Next, we will show you how to use HTML coding to insert tables in WordPress. This method is a bit technical. So, use only if you are comfortable with coding.
First, copy the code below:
<table style="text-align: center; height: 152px;" border="1" cellspacing="0" cellpadding="0" width="390">
  <tbody>
    <tr style="background-color: #e9e9e9; font-weight: bold;">
      <td>Title 1</td>
      <td>Title 2</td>
      <td>Title 3</td>
      <td>Title 4</td>
    </tr>
    <tr>
      <td>Detail One</td>
      <td>Detail Two</td>
      <td>Detail Three</td>
      <td>Detail Four</td>
    </tr>
    <tr>
      <td>Detail One A</td>
      <td>Detail Two A</td>
      <td>Detail Three A</td>
      <td>Detail Four A</td>
    </tr>
  </tbody>
</table>
Now, go to the block editor and add an HTML block. Once you finish that, paste the HTML snippet we mentioned above.
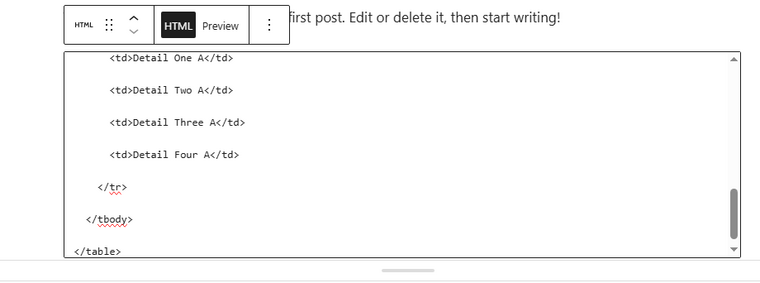
Update the post and check it from the front end. You will see the table there.

Feel free to modify the HTML code and its contents to match your requirements. You can also mention the div class in the code to style the table differently.
Next, we will show you how to add tables in WordPress using the classic editor plugin.
4. Using the WordPress Classic Editor
We need to use a special plugin to insert a table in Classic Editor — Advanced Editor Tools (earlier known as TinyMCE Advanced) is a popular plugin for adding responsive tables to WordPress Classic Editor.
- Install and activate the Advanced Editor Tools plugin to access the Table Insertion Tool in the Classic Block or Classic editor if you are still using it.
- The plugin adds a toolbar to the editor for creating, modifying, and customizing tables, as shown in the image below.
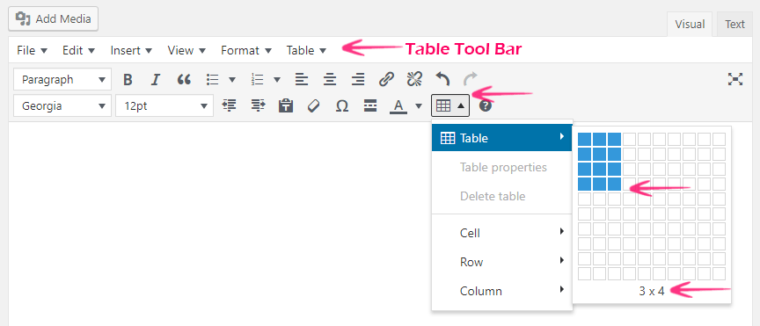
- To add a new table, click on the Table Insertion Tool and select the number of rows and columns you need.

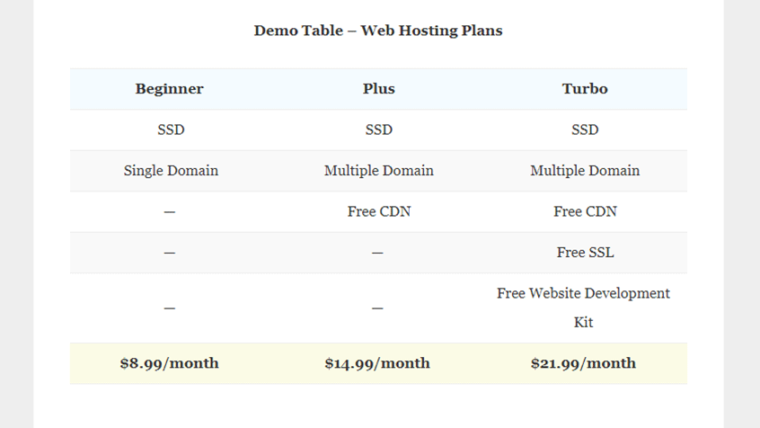
- Publish it once you are done.
Best WordPress Table Plugins
Table plugins are the perfect solution to display data in an organized format on your WordPress site. They help you create everything from simple pricing tables to complex product tables with just a few clicks.
Here are the best WordPress table plugins you can use:
- TablePress – A popular free plugin with excellent table editing screens and search functionality
- wpDataTables – Perfect for dynamic tables with Google Sheets integration and chart templates
- WP Table Builder – User-friendly table builder plugin with pre-built templates and stylish tables
- Ninja Tables – Offers limitless customization options for border style and row colors
- Data Tables Generator by Supsystic – Great for auto-generated tables with a built-in color picker
- WP Data Access – Advanced plugin for custom post types with extra features
- Flexible Table Block – Works with the block editor’s built-in styling options for a plain background
- Visualizer: Tables and Charts Manager – Create appealing tables and data visualizations in real time
Each type of table plugin offers different features — from simple table headers to a complex array of customization options.
Whether you need event schedules, product tables with images, or a table of contents, these tools provide the variety of customization options you need for a superb table experience.
Your experience of using these table generator plugins may vary, but most offer an intuitive admin interface with common styling options and additional tools to enhance your tables.
Best Practices for Creating Tables in WordPress
If you need to create the best tables in WordPress, follow these steps:
- Design responsive, beautiful tables that enhance the user experience across all devices.
- Use customization options like background color and CSS styles to match your site’s branding.
- Opt for advanced tables with features like custom sorting and a built-in search bar for better usability.
- Keep your data well-organized using clear, structured content and neatly arranged individual cells.
- Add interactive tables where needed to improve engagement and navigation.
- Maintain consistency and readability by avoiding clutter and keeping your tables clean and functional.
Frequently Asked Questions
Now, let’s look at some frequently asked questions regarding this topic.
How Can I Align Columns Properly in a WordPress Table for a Consistent Design?
Use the column alignment option in your block editor to ensure your table layout looks balanced across all devices.
What Are the Best Ways To Add Color to Table Cells in WordPress?
You can use the color settings or custom CSS to apply a color palette to individual table cells, enhancing readability and design appeal.
Can I Create Responsive Tables in WordPress Without Using a Plugin?
Yes, using the block editor’s built-in method, you can create responsive tables that adapt to different screen sizes.
Is It Possible To Use Advanced Features Like Search Filtering In WordPress Tables?
Yes, plugins with advanced elements such as wpDataTables often have features like search filtering and sorting to improve table usability.
What’s the Best Approach To Handle Complicated Designs With Multiple Table Rows and Columns?
You can use an advanced WordPress table plugin like wpDataTables to handle those. With the plugins, you can create comparison tables, edit the created table, export the contents to a CSV file, etc.
Can I Apply Custom Styles to Individual Table Elements?
Absolutely. You can individually style table rows, columns, or cells using CSS or a plugin like wpDataTables that offers advanced options for customization.
Which Plugin Should I Use for Table Color Settings and Design Customization?
Plugins like wpDataTables, TablePress, Ninja Tables, and WP Table Builder provide enhanced color settings, pre-built themes, and customization options to style your tables beautifully.
What’s the Best Way To Format Table Content for Better User Experience?
Organize your table content with clear headings and use bold or italic tags as you need. To maintain a professional design, stick to your site’s color options and fonts.
Conclusion
Creating and managing tables in WordPress has never been easier.
Whether you need to create simple tables using the WordPress table block or more complex tables with any of the dynamic plugins, creating tables with WordPress is a cakewalk.
This step-by-step tutorial covered four popular methods. Using the Gutenberg editor, using a dedicated plugin, using custom HTML code, and in the classic editor. All three methods we mentioned are beginner-friendly.
We recommend picking a method that suits you. For example, if you do not need additional plugins, use the Gutenberg table block. If you need complete control, go with a table plugin method.
The HTML method is a bit technical, but it can be handy in situations when you need to use an advanced method.
Do you know any other methods to improve your WordPress tables?
Let us know in the comments.


Hi, Shashank,
Can this plugin provide fill color in table cells? I searched a lot but failed. I am a beginner for WordPress and don’t know the coding.
Kindly help me, if there any additional CSS is available for the purpose. I need table inside my posts having colored cells.
Thanks.
Hey Feeroz,
Yes, you can add additional CSS required from ‘Text Editor’. You can easily Google it to find some ready to use CSS.
Thanks for stopping by.